(3). PowerBI Service

3.1 Before we start

Note: refreshing through an on-premise gateway is not possible with a trial licence (30 days) of the IXON Power BI connector.
Why do we need to set up on-premise gateways for Power BI?

Our IXON connector for Power BI Desktop is a custom connector, meaning data refresh can only be performed manually. For data to be refreshed on a schedule, Power BI requires setting up an on-premise gateway. Once the on-premise gateway is set up your IXON data will always be up-to-date when using Power BI.

Requirements:
 

3.2 Install an on-premise gateway

On-premise gateways can be installed in either personal or standard mode. More information about the difference between these modes can be found here.

Note: If you’re unsure of which mode you should install, we recommend checking with your IT team.

Because the gateway runs on the computer that you install it on, be sure to install it on a computer that’s always turned on. For better performance and reliability, Microsoft recommends that the computer is on a wired network rather than a wireless one.

1. Download the standard gateway

2. In the gateway installer, keep the default installation path, accept the terms of use, and then select Install.

3. Enter the email address for your Office 365 organization account, and then select Sign in. The gateway is associated with your Office 365 organization account.
You manage gateways from within the associated service.

4. Select Register a new gateway on this computer > Next.

5. Enter a name for the gateway. The name must be unique across the tenant. Also enter a recovery key. You’ll need this key if you ever want to recover or move your gateway. We can leave the checkbox at ‘Add to an existing gateway cluster’ unchecked. Select Configure.

6. Review the information in the final window. Because this example uses the same account for Power BI, Power Apps, and Power Automate, the gateway is available for all three services.

7. Make sure the IXON connector can be found by the on-premise data gateway.

Note: it is mandatory to keep the gateway running for the scheduled refresh to function.

For the most recent version of this guide see the official guide by Microsoft here.

3.3 Use the on-premise gateway within Power BI.

  1. Go to app.powerbi.com. At the top right select Settings > Manage connections and gateways
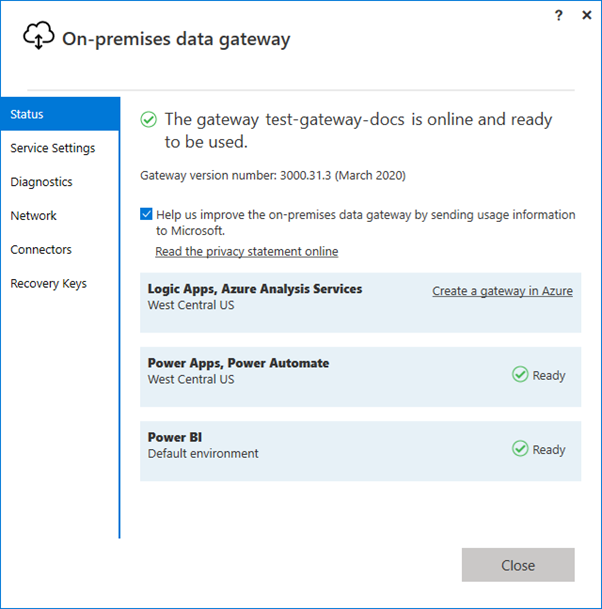
  2. Select the tab on-premises data gateways. Here it should show the gateway we created in the previous chapter.
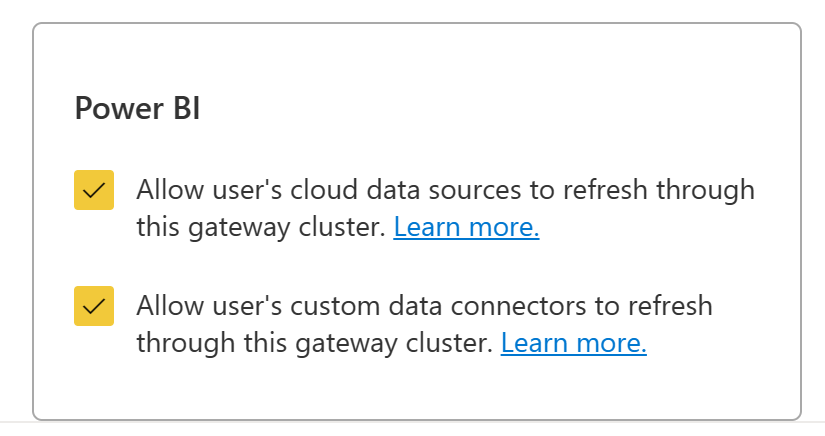
  3. Open the settings of the gateway. And make sure the gateway allows the following:
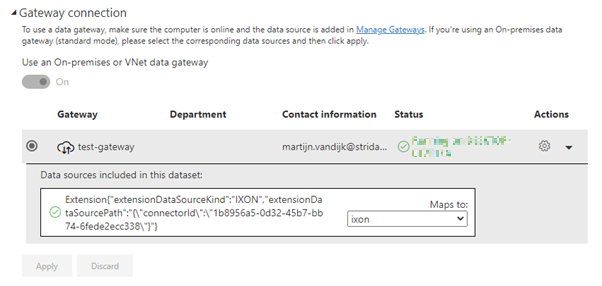
  4. Ga back to the first tab Data Sources. Here we select New.
  5. Select the cluster we created using the gateway software. And give the Data Source a name.
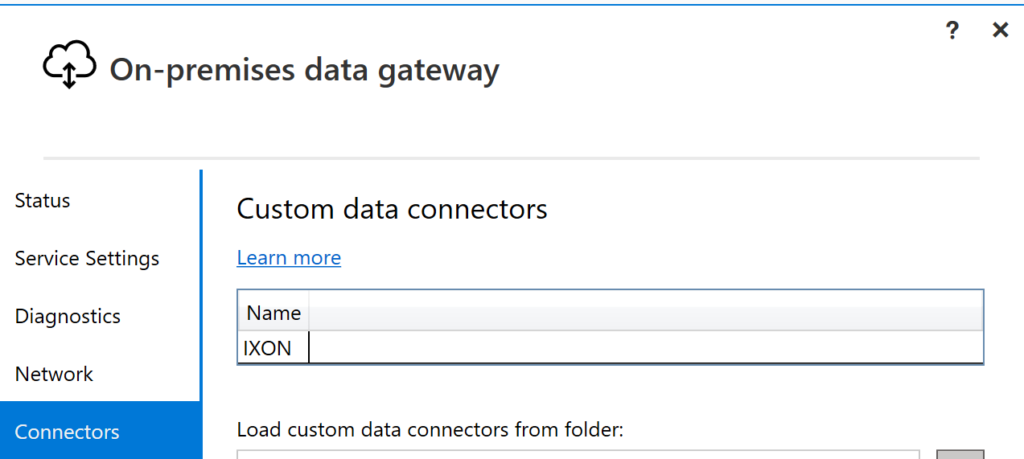
  6. In the dropdown menu of data source type select the IXON connector.
  7. Select the IXON portal url. (https://portal.ixon.cloud/)
  8. Select basic authentication.
  9. Fill in your IXON credentials.
  10. Set privacy level to Organizational.


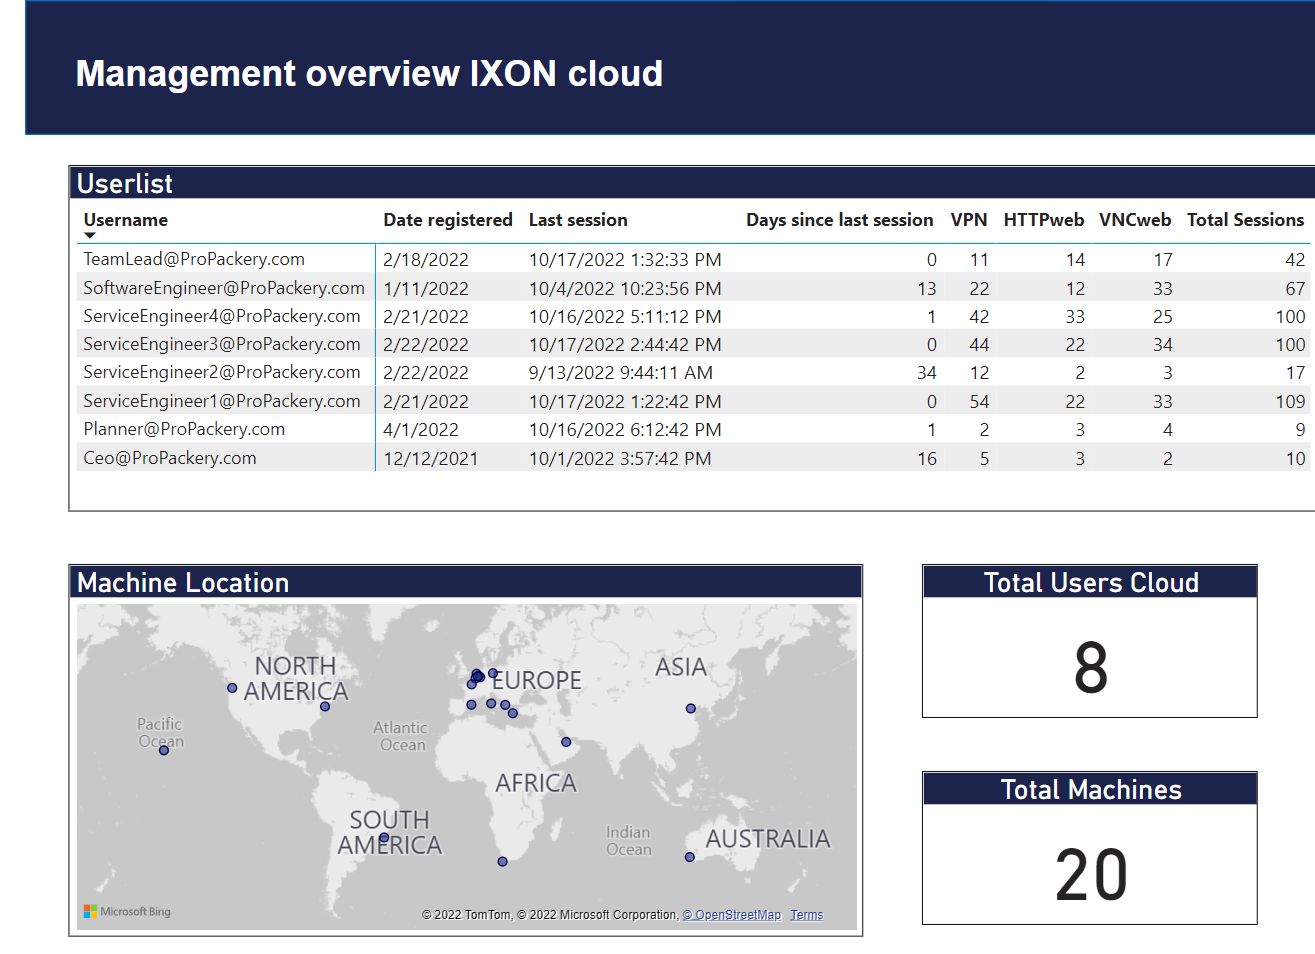
We have now set up a new data source within Power BI.

3.4 Enable scheduled data refresh

1. Publish a report using the IXON connector.

2. The related dataset should show up within Power BI. Select the ‘three dots?’ (open menu) and select Settings.

 3. Select Gateway connection and map the gateway to the data source we created in the previous chapter.

4. Select Scheduled refresh. You should now be able to enable scheduled refresh.

Share the Post:

Related Posts

Request custom connector