Connector guide IXON:
2.1 Load the connector into PowerBI Desktop
In Windows, copy the IXON.mez file to the following folder:
-> Documents\Power BI Desktop\Custom Connectors
(If this folder does not exist, please create it).

2.2 Modify options and settings
Start PowerBI desktop.
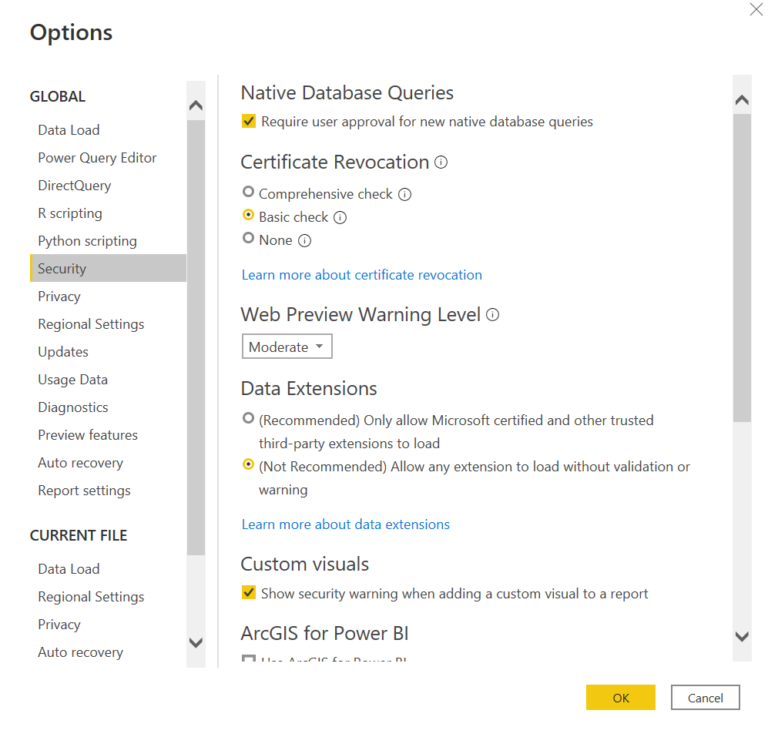
In order to load the connector into the PowerBI desktop you need to allow any extension to load. This can be done in the following way:
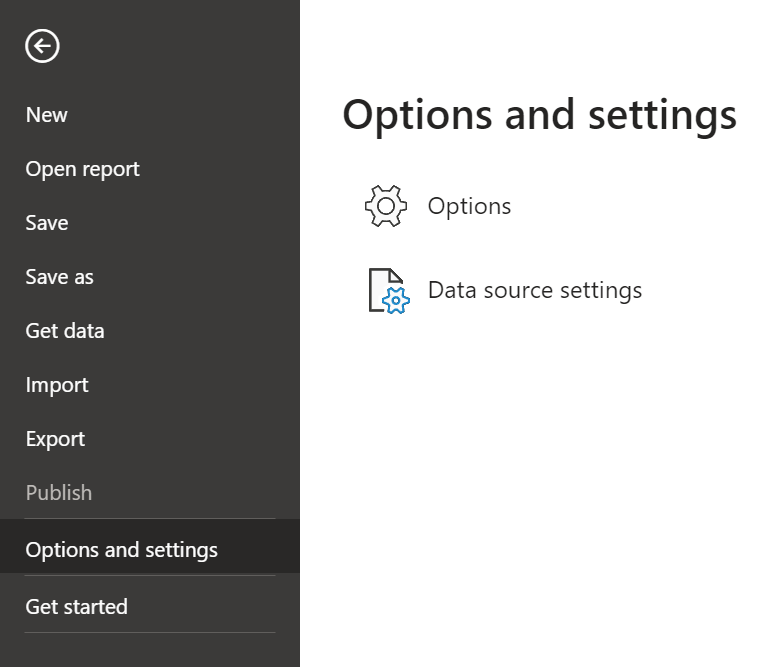
Go to File > Options and settings > Options > Security and enable ‘Allow any extension to load without validation or warning’
2.3 Get data out of the IXON cloud!
Close and restart PowerBI desktop.
Click ‘get data’ button.

Close and restart PowerBI desktop.
Click ‘get data’ button.
Select the IXON connector from the list ‘other’, or by searching ‘IXON’.
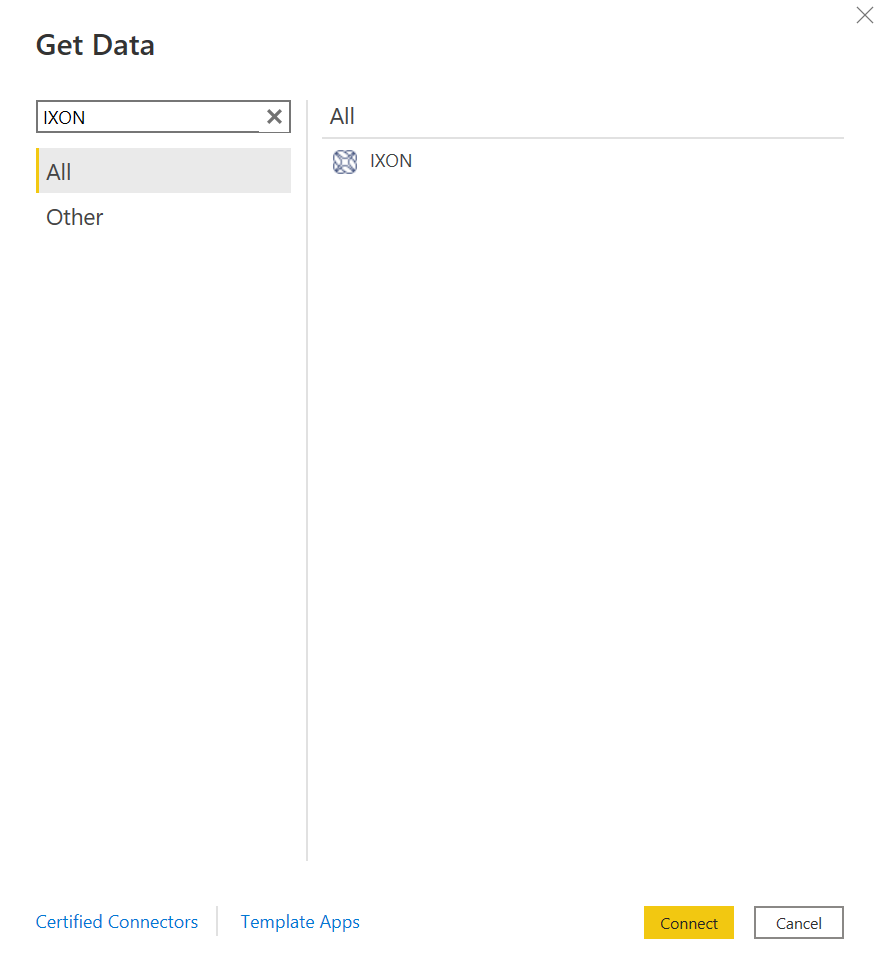
The IXON connector will then ask for the following details:
- License code: which you will receive together with the mez file.
- One Time Pass (OTP): this is optional.
- Historic logging data: which time period do you want to analyze.

The IXON connector is now installed!
Select the data you want to extract from the IXON cloud with the help of the dynamic navigator:
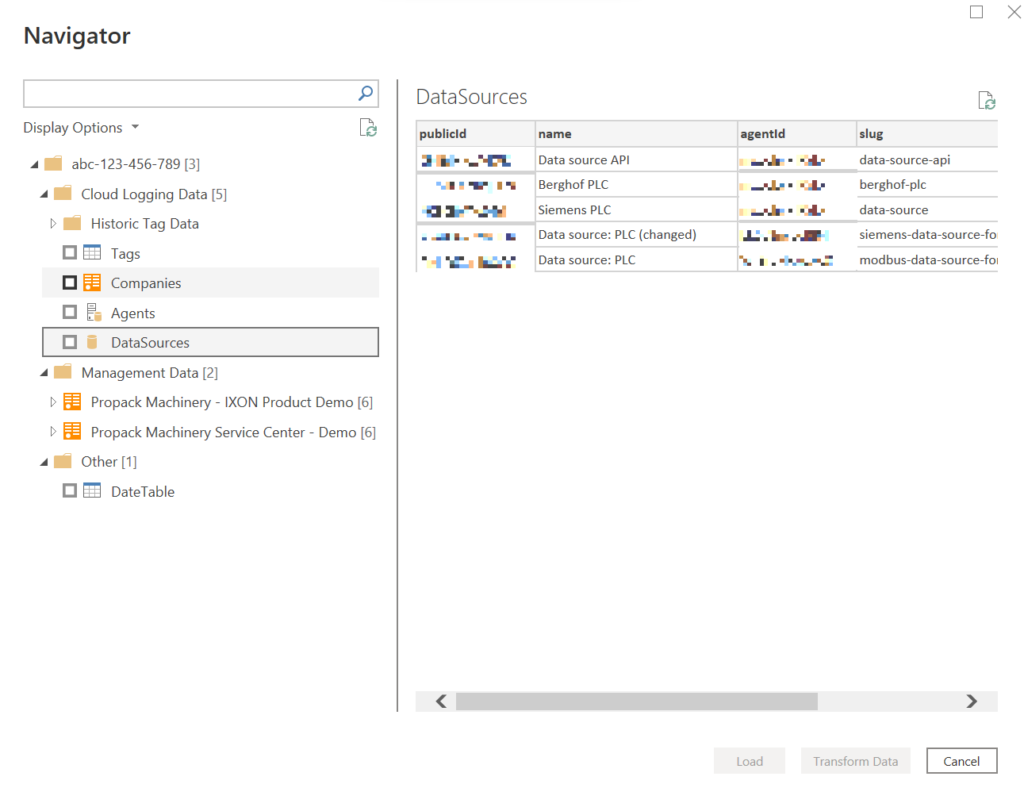
Note:
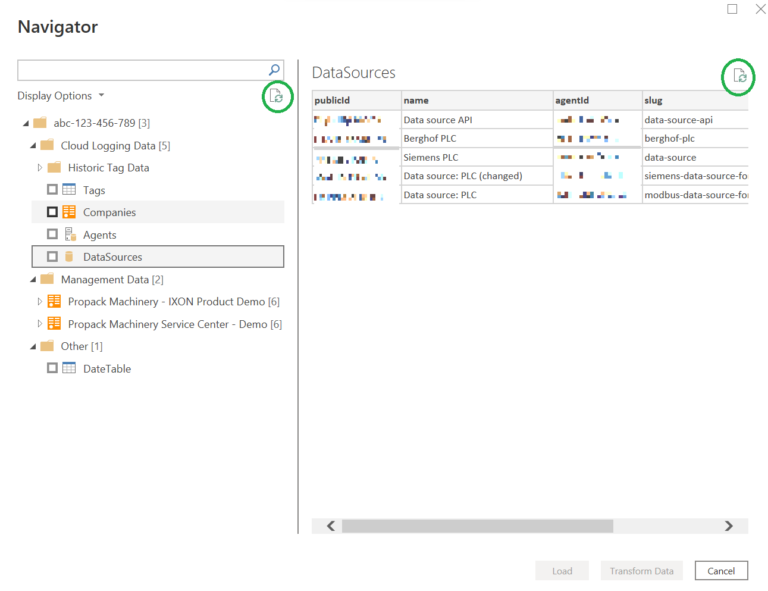
Sometimes the navigator has to be refreshed in order to extract data.
This can be done by clicking either of the following two buttons:
2.4 One data table with multiple tags (Optional)
If you want to combine multiple tags extracted from the IXON cloud into one data table the following needs to be done:
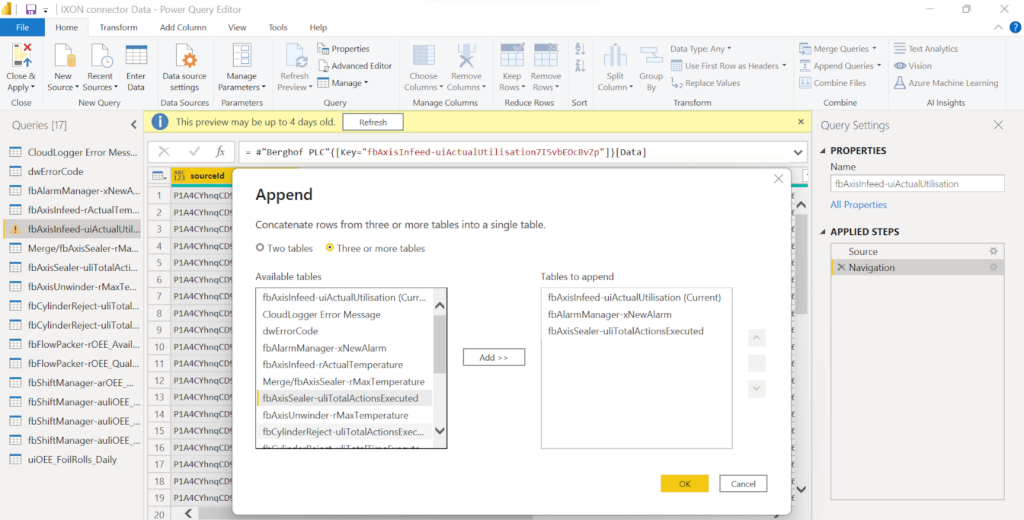
Load the (desired) tags into Power BI → then go to transform data:

→ Click on Append Queries:

→ Append tags (as desired):
